Introduction
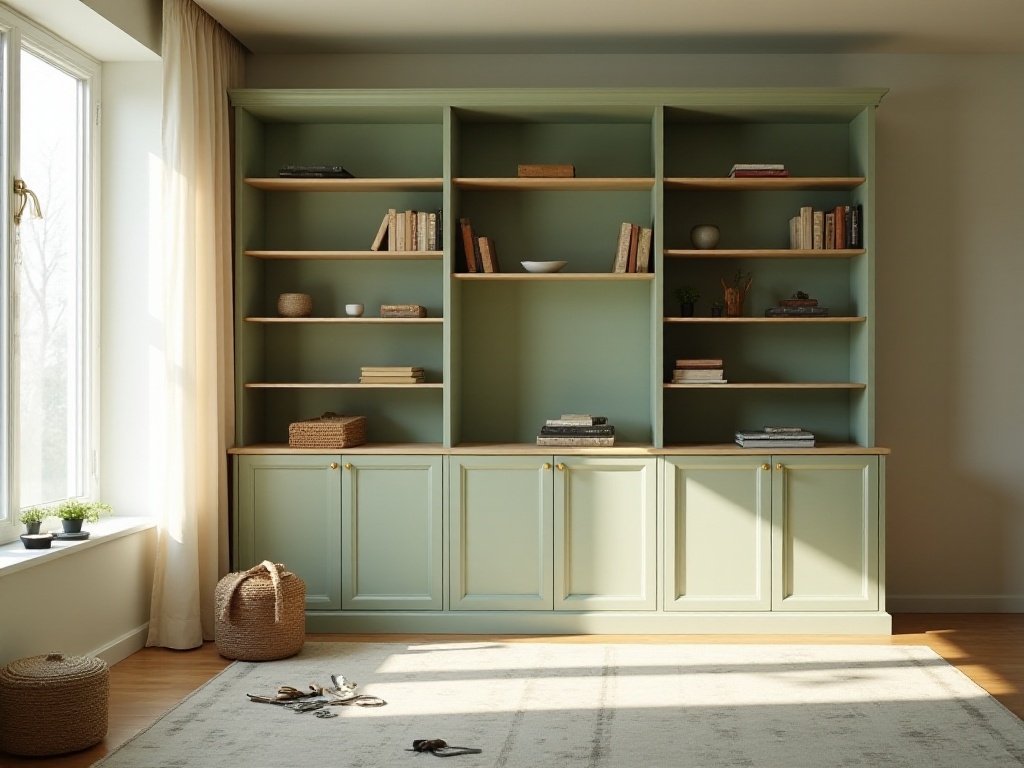
Recently, I've grown tired of looking at my IKEA bookcase at home. Every time I see it, I feel uninspired. I considered buying a new one but was shocked by custom furniture prices - starting at 6,000-7,000 yuan, way too expensive! Then I came across posts on Xiaohongshu about IKEA furniture transformations, and I got really excited! After careful consideration, I decided to transform my IKEA bookcase into a high-end built-in bookshelf. I'm documenting the entire process to help others with similar ideas.
Material Selection
To be honest, I've had my original bookcase for several years and forgot the model number. For this transformation, I specifically bought a new BILLY bookcase from IKEA. I chose BILLY for simple reasons: it's an IKEA classic, with the basic version costing only 499 yuan - excellent value for money. Its simple rectangular structure with side panels makes it perfect for modifications.
Most importantly, BILLY's popularity means there are many compatible accessories available in the market. Whether it's shelves or other decorative items, they're easy to find. When I searched on Taobao, there were several pages of accessories specifically designed for BILLY. This made my transformation work much easier.
When buying the bookcase, I carefully measured my home's dimensions. BILLY's size matched my wall perfectly, requiring minimal adjustments. This was another key factor in my decision. If the size isn't right, modifications become much more complicated and might require custom cutting.
Transformation Process

Initial Planning
Usually, I'm pretty casual about things, but I took this transformation seriously. I spent an entire week on preparation. After work each day, I measured everything - room dimensions, wall evenness, outlet locations - and recorded all details. I even created an Excel spreadsheet listing all required materials and tools.
During this time, I obsessively browsed Taobao and Xiaohongshu, studying countless transformation cases. Some bloggers shared incredibly detailed experiences that got me excited. However, there were also cautionary tales, like one blogger who ran out of materials mid-project and couldn't find the same items in stock, forcing a redesign.
So I was extra careful with material selection and quantity calculations. I bought 30% extra decorative trim and extra paint. Better to spend more than run short of materials. I also bought a laser level - expensive but extremely helpful for installation.
Specific Steps
The first step was basic mounting. This really tests your patience. I bought professional expansion bolts from a hardware store, where the owner explained different types in detail. I chose German-imported ones - pricier but worth it for security.
During installation, I was extremely careful, repeatedly checking each screw's position with the level. This step alone took an entire afternoon. There was a minor incident where I accidentally hit an electrical wire while drilling, forcing me to shut off power and replan. This reminded me to always check for wires and pipes in walls before installation.
Next came the main event - installing decorative trim. I chose Nordic-style wooden trim at 35 yuan per meter. Expensive, but the quality was excellent. I bought a miter saw specifically for perfect 45-degree cuts. This tool was worth the investment - a regular handsaw couldn't achieve such precise angles.
Installing the trim was both physically and mentally demanding. I used super glue with a nail gun for mounting, constantly adjusting each piece's position. The corners were especially tricky - even slight misalignment would ruin the overall effect. One corner took nearly two hours of repeated attempts before I was satisfied.
The final painting stage was physically demanding. I chose water-based paint - more expensive but environmentally friendly with less odor. Initially tried using a roller brush, but wasn't satisfied with the results, so bought a spray gun. The spray gun definitely produced superior, more even results.
I applied five coats of paint: two primer coats for surface evenness, followed by three topcoats, carefully sanding between each coat. This process really tests your patience, but the results get better with each layer, creating an addictive sense of achievement.
I also added some innovations, like LED strip lights under certain shelves - an idea that came while installing the trim. I chose color-temperature adjustable strips, which make the entire bookcase look especially high-end when lit at night.
Cost Analysis
Honestly, I was shocked when I totaled the costs. The bookcase itself was 499 yuan, about 20 meters of decorative trim cost 700 yuan. Paint and tools cost over 600 yuan, with the spray gun alone being 200 yuan. Adding other accessories like LED strips and thickened shelves, the total came to just over 2000 yuan.
But considering that a similar custom bookcase would cost 6000-8000 yuan, and would be fixed in style, this seems reasonable. With my transformed bookcase, I can simply change the paint color or trim if I want a new look in the future.

Usage Experience
After using it for nearly a month, here are my thoughts. First, the quality feel is completely different from before. The original bookcase was typical IKEA style, but now it looks like high-end custom furniture - even my mom asked if I'd bought a new custom bookcase.
Functionality has improved too. I replaced all shelves with thicker versions, so they don't warp under heavy books. Being wall-mounted makes it much more stable - no wobbling even when using a ladder to reach top shelves.
I'm most satisfied with the storage space utilization. Through careful planning, I added storage in dead spaces. For example, I created a hidden compartment at the bottom for rarely used items. The gap between the top and ceiling became a concealed storage space using decorative trim.
The lighting is fantastic - the LED strips create a cozy atmosphere at night. Sometimes when I'm tired from work, I sit on the nearby sofa with the warm lights on and read, feeling completely relaxed.
Important Notes
For those wanting to attempt this, be prepared. This isn't a quick project - it took me two full weekends. It's physically demanding, especially the painting phase, which was exhausting.
Space is also a concern. Painting creates strong odors, even with water-based paint. I sealed off my balcony as a painting room with a large fan for ventilation. Even so, the smell took several days to dissipate. Without suitable painting space, carefully consider your options.
Have all tools ready beforehand. Level, electric drill, miter saw - these are essential. Either buy quality tools upfront or borrow them. I tried saving money with cheap tools initially, which broke and ended up costing more.
Conclusion and Future Plans
This transformation gave me great satisfaction. Visitors always compliment the bookcase. I also learned valuable practical skills like using various tools and understanding renovation materials.
I'm already planning my next project - transforming my IKEA sideboard. With experience from the bookcase project, this should go more smoothly. Having the tools already will help control costs better.
The greatest joy in furniture transformation isn't saving money, but the satisfaction of turning ordinary items into unique pieces. Every time I look at the transformed bookcase, I feel proud of creating it myself. That feeling is priceless.


